Minnie Mouse Giant Cupcake
I posted a few weeks about my decision to try using the Wilton giant cupcake pan again for my daughter's second birthday. My first attempt wasn't exactly as successful as I wanted it to be. I decided for her second birthday to make her a Minnie mouse giant cupcake using the same cake pan. Anyone who has used this giant cup cake pan can tell you it's a little trickier than average, but I always love a good challenge. I decided that after my first attempt, I had to change several things in order to get the results I wanted.
Since the cake pan is made by Wilton I went on their website and read through all the information and customer comments about the giant cupcake pan and realized that the best results seemed to always come from using a modified boxed cake mix rather than a cake mix from scratch. If you know me, you'll know that the thought of baking a cake from a box mix goes against every fiber of my being. Not because there is anything terribly wrong with box mixes but I'm just into making everything myself, from scratch. Either way I decided that for her second birthday I was going to focus on making a pretty and delicious cake rather than a healthy cake. The modified recipe required two box mixes, extra eggs and two boxes of pudding powder. I decided it was worth a try!
Two days before her birthday I started out with the Minnie Mouse accessories for the cake. I saw many different versions of this online, but decided to keep it pretty simple since this would be my first experience decorating a cake like this. Many years ago I worked as bakers assistant in the bakery of a supermarket but never got to decorate anything of this nature. I planned to make a bow, ears and a giant cupcake liner to decorate the cake. I purchased everything I needed for this part of the project from Joann's. I bought fondant, in black, red and white, gum paste, icing color and candy melts
I started by kneading and rolling the black fondant and then using a medium sized mug to cut out two circles which would be the ears. I placed toothpicks inside the ears so I could use those picks to attach the ears to the cake later. Then I put them in the fridge to harden.
Next I had to work on the hardest part of the cake; the signature polka dotted Minnie mouse hair bow. I knew from reading online that the best bow should be made out of a mix of fondant and gumpaste. I was nervous about this because the gumpaste is white and I would have to color it myself. I also wasn't sure the exact size to make the bow. Now looking back, I think I could have made it slightly smaller to fit better on the cake. I broke off a chunk of the gumpaste, and using a toothpick gradually added icing color until I liked the color it was. Then I mixed it with an equal amount of red fondant. It looked really streaky at first but after kneading it for a while I finally got it right.
I then cut the rolled fondant/gumpaste mix into one long strip which I formed into the shape of a bow and used a small strip as the center of the bow. It was a lot harder than I thought it would be to get the bow to look right. Hats off to all the bakers out there, it's a tough job! Once I was happy with it, I put it in the fridge and went to work on the polka dots.

I kneaded and rolled out the white fondant and used a large smoothie straw to cut out little circles, Then I used water to attach them to the red bow. Once the bow was completed, that also went straight into the fridge to dry.
Later on I decided to make little cup cakes to go with the giant cupcake so I rolled out more black fondant and cut out mini ears to decorate the cup cakes. I didn't have a circle cutter so I used a 1/3 measuring cup which left some indents on some of them, but it wasn't too noticeable when it dried and hardened.
After spending all that time on the fondant decorations, baking the cake itself seemed super easy.
I chose to use the Duncan Hines yellow cake mix since that brand is recommended by Wilton. I added the eggs, vegetable oil, pudding powder and water using my hand held mixer until the batter was nice and creamy.
Then I used Crisco vegetable shortening to grease the cake pan, followed by what was supposed to a dusting of flour, but ended up being a little too much flour! This made the cake look a little dusty and spotted when it was baked. For those that remember, last time around I gave the bottom of the cake a 12 minute head start in the oven before pouring batter into the top half to avoid the top being overcooked. This time around I overcame that issue a different way. I followed the instructions on the wilton website to pour precisely 3.5 cups of batter into the base of the cake pan and 2.5 cups in the top portion of the pan. I also decided to cover the top portion of the pan with parchment paper to avoid that section of the cake being over cooked
I had a bit of batter left over so I used that for the cup cakes. I had enough for eight cup cakes. As expected the cupcakes baked much faster, I took them out as soon as I was able to poke them with a toothpick and the pick came out clean. It probably took about 35 minutes with an oven temp of 325.
Once the cake was finally done I took it out and left it to cool on the rack.
After taking a break for a few hours, I decided it was time to make the giant cup cake shell. This is basically a hard candy shell that looks like a cup cake case. This really makes the giant cupcake look so much better. I had seen this on many blogs but was too scared to even consider trying it last time. This time around I decided I had nothing to lose by trying. It took me three tries to get it right and I actually nearly just gave up on the shell. I made a few mistakes the first two times and wasn't happy with how the shell came out. But the third time it was perfect!
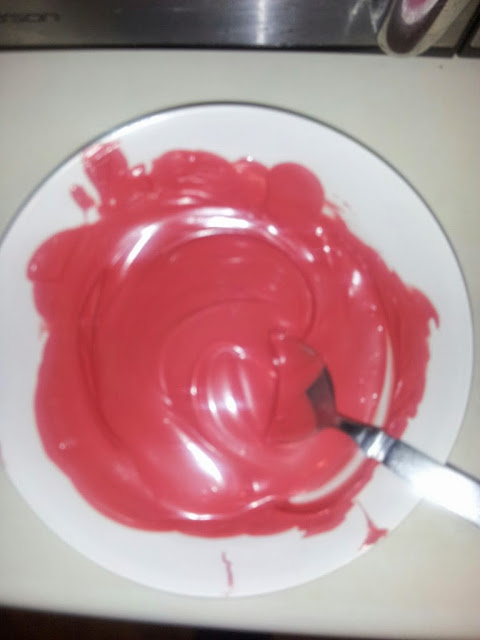
I started by melting half a bag of red candy melts in the microwave. The goal is to melt it down until it is smooth and creamy. Once it cooled down a bit to almost room temperature, I used a spoon and my finger to "paint" the inside of the giant cupcake pan with the melted candy melts. (The first time I tried this I put Crisco shortening in the cake pan but that was a bad idea. You really do not need any grease in the pan at all. ) Once I had a nice thin layer painted in the pan. I put it in the fridge for about 30 minutes. Once it had hardened I repeated the process and painted another layer until the inside of the pan is covered in a thick layer of candy melts. I put it back in the fridge and left it there overnight, I didn't even attempt to take it out of the cake pan until the next day.
My previous two attempts I made the shell too thin so it was cracking when I tried to take it out. I also tried using the outside of the cake pan to make the shell, to avoid having to trim the sides of the cake to fit into the shell. However that attempt failed terribly. Anyway the next day when I turned the cake pan upside down the thick shell came out smoothly and perfectly!! I was ecstatic!!
For the bottom of the cake to fit into the candy shell I had to trim the sides of it and then I frosted it. I chose to use Duncan Hines cream cheese butter cream frosting, rather than make my own, to save time and because it would be the perfect consistency. I left the frosted cake in the fridge for a while before placing it into the shell.
Then it was time to frost the cupcakes. I tried to use a clever looking cupcake decorating tool I bought from Shoprite but it was frustrating as it needed to be refilled constantly, so instead I went back to using my trusty wilton decorating bags and a star tip to frost the cupcakes. Once the cake was frosted I added the mini fondant ears.
Finally I levelled and frosted the top of the giant cupcake, then added the bow and ears to finish it off. Once that was done, I used frosting to attach the top of the cake to the bottom of the cupcake
Once the frosting had hardened in the fridge I declared it mission accomplished and presented it to my daughter. Her face when she saw the cake was just priceless. She was so happy, she kept dancing around the cake and looking at it from all different angles. She kept singing happy birthday to herself and giggling with glee! she especially loved nibbling on the cupcakes and licking the frosting off!! Now I can pack away this giant cup cake pan and feel that I actually made good use of it!


.JPG)


that giant cupcake is delightful! Love the Minnie mouse ears, perfect for a little girl. You did a great job! Missing your posts.
ReplyDeletehugs,
Marian
Thanx maz! I need to get back on the posting Wagon!
ReplyDeleteYou've made some decent points there. I checked on the internet
ReplyDeletefor more information about the issue and found most
individuals will go along with your views
on this web site.