Tissue paper birthday number
My little baby from above is 4 years old, can you believe it? I surely can't! This year we kept her celebrations simple by having a little cupcake and treats party at her preschool. I also wanted to have our customary little photo shoot to capture her sweetness at this age! All those who know me understand how much I love photography, and I jump at the chance to experiment with different light, textures and colors with new shoots all the time. Kids make the best subjects for photos, they don't worry about "bad pictures" and allow you to capture unscripted Kodak moments.
As usual I had an overload of ideas for the shoot and finally decided a simply tissue paper number 4 would be the perfect prop for her pictures! Once the idea was planted in my head, there was no shaking it.
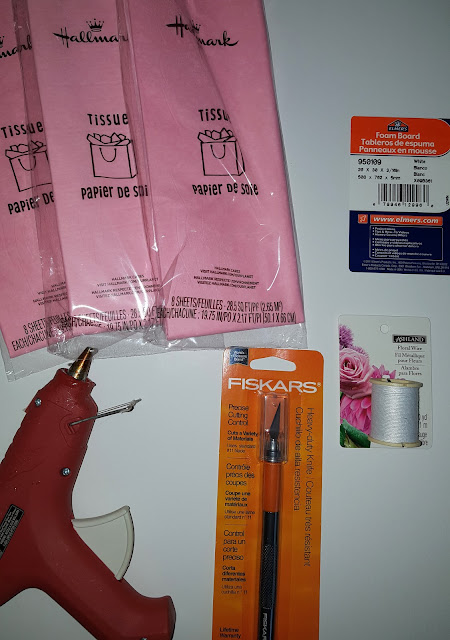
I assembled all the materials I needed and got to work. For this project I used the following
20x30x3/16 inch foam board
1 pack of pink gift tissue paper
floral twine
Fiskars heavy duty knife
Glue gun
Ruler,scissors, pencil
I stared out by drawing the large number 4 on the foam board. As you can see it took me a few tries to get it right. I did it free hand without using a template, so it was little tricky getting the proportions right at first. Can I just say once again how much I love my Martha Stewart craft ruler? It's the ruler of all rulers and has been a trusty aid for years and years!
Once I was finally happy with the shape of the number 4, I used the Fiskars knife to cut it out, I had a cutting mat underneath it to protect my floor.
The edges weren't perfectly straight but that was okay for my purposes. The next step was to start making the tissue paper flowers. Its been years since I last made flowers out of tissue, so I started out with the very basic look and then remembered how much better it would look if I scalloped the edges of the paper.
Firstly I took the tissue out of the pack and unfolded it. It was in layers of 8 sheets. I kept all 8 sheets together and cut through all the layers of the tissue paper into rectangles that were roughly 6x7 inches, you could just as easily cut the paper into squares, it would still give the same effect.

Once the paper was cut into rectangles I folded them into an "accordion" or "fan", by folding over and under. Then I tied the floral wire tightly in the center of the "fan",
For the first few simple looking flowers I "fluffed" out the layers of tissue to create the flower.
However after the first few flowers I remembered that I could scallop the edges to create a more textured look . So for the rest of the flowers I folded the paper into a fan, then cut the edges into a scalloped shape.
Once I had enough flowers to cover the number 4, I started to glue them to the foam board number, and within no time, I was done!!
And this is the finished project in action!
I would say this a is a fairly simple DIY project and I was done with it in a few hours even with constant interruptions from my almost 4 year old little helper!!


Comments
Post a Comment