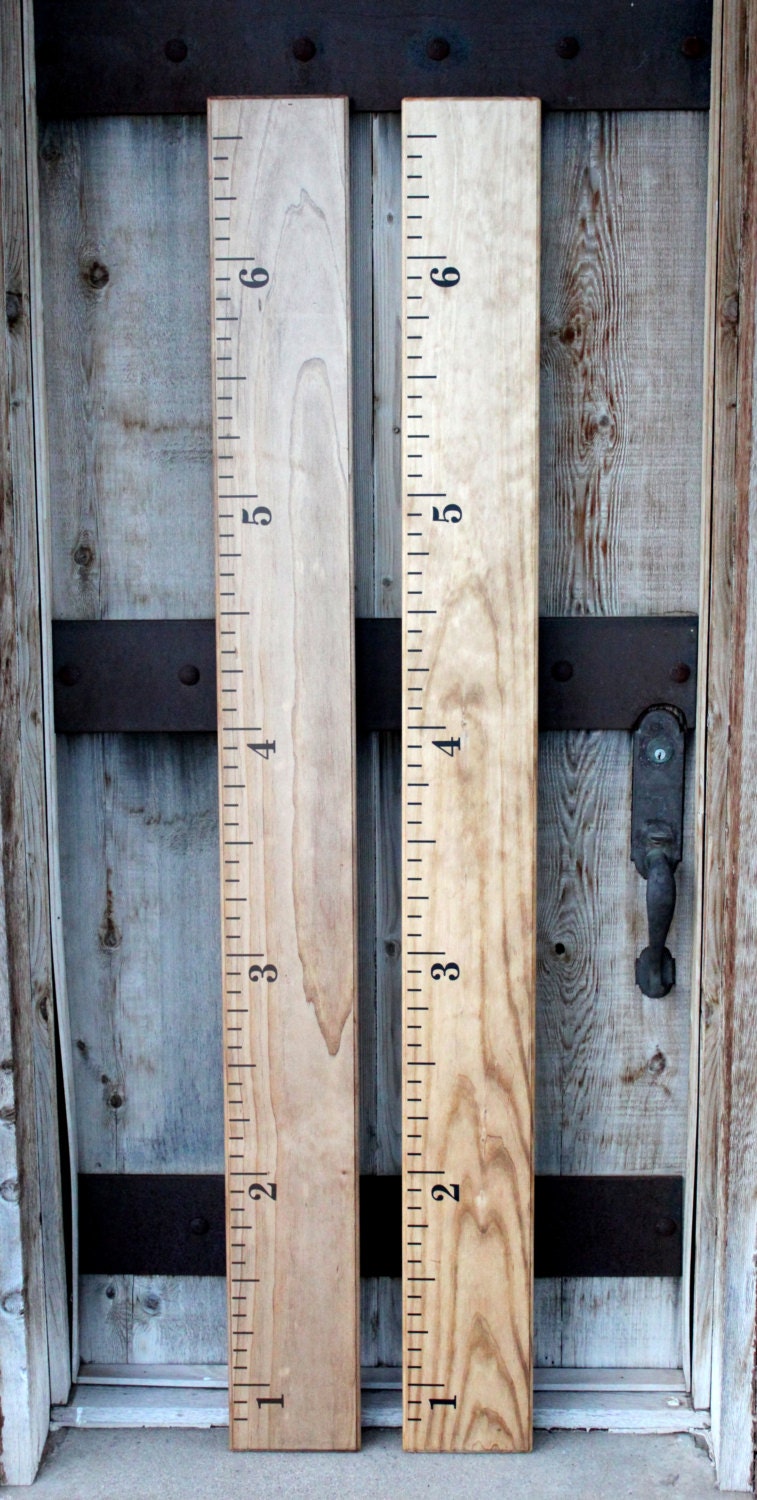
Our DIY wooden growth chart!
I always knew I wanted some sort of a growth chart on my daughters wall, but couldn't decide what kind would be best. As I mentioned previously, even though I briefly considered wall decal charts, I ultimately decided to go with the wood growth chart instead for several reasons. Firstly I adored the look of the oversized wood ruler and it was actually the most practical option for us because if we ever decided to move we could just take it along with us.
These oversized rulers are available for purchase at places like Pottery Barn Kids, or even on Etsy, but as usual I wanted to add a personal touch by making it myself. It seemed relatively straightforward; all I needed was a piece of wood, some wood stain and paint. However because I didn't want the smell of paint or wood stain to overwhelm our home and I didn't want to leave it out to dry either because, well it was raining all time. I decided to get a little more creative. I went on etsy and found a seller that makes chart decals that can be applied to wood. This is basically a set of pre-measured ruler markings in 12 inch strips that I can apply to the wood which will look like it has been painted or embossed once complete.
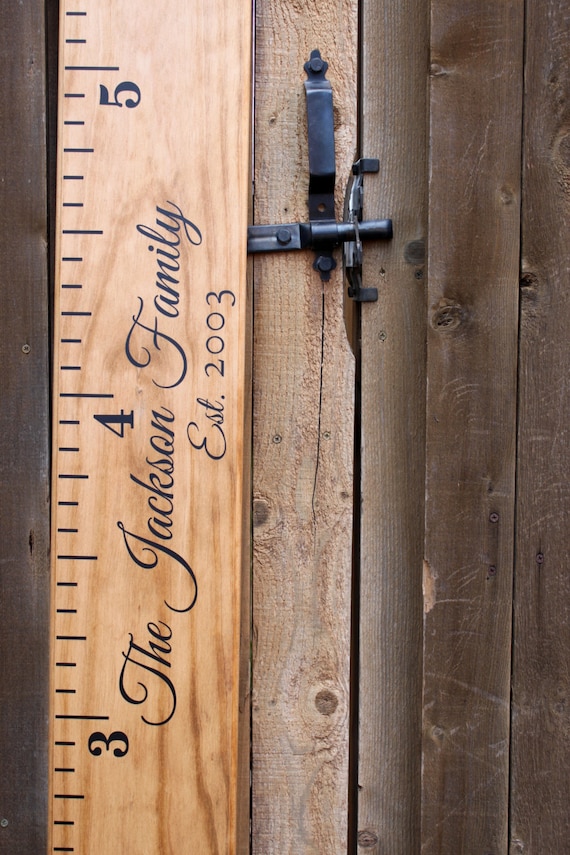
At first I was undecided about whether I liked the look of it with the family name, because it seemed a bit crowded to me, but in the end I decided I would get it with the name and just use a wider cut of wood.
So we all headed out to the lumber section of our local Home Depot to pick out a 6ft piece of wood for her ruler. Originally I was planning to buy a raw cut of pine wood and then I would have to sand and stain it myself however I found a pre-finished cut of oak wood which was already the perfect size and color which would save me even more time and work! The exact dimensions of the wood was 1 x 6 x12 (one inch thick, 12 inches wide and 6 ft long)
Once I brought the wood home it still needed a bit of sandpapering over the edges. Thankfully it stopped raining long enough for me to get that done outside
Once that was done I grabbed my tape measure (because I couldn't find a ruler), and starting marking off 12 inch intervals on the plank of wood. Then I started applying the decal. It was a little bit trickier than I anticipated because the decal markings weren't really in the right order. I assumed that each 12 inch strip of markings would be a full set of ruler markings, i.e. from 1 inch to 2 inch but instead the decals were more like from half an inch to 1.5 inch so it was bit confusing applying it. I understand that the seller set it up this way because most people choose to hang their decal about 6 inches off the floor to make up for the baseboard that runs along the wall. Our current place has very flat baseboards so I wanted to make the growth chart like a real ruler and start from zero, hence the reason why it was harder for me.
Unlike previous decals I have worked with, these markings didn't seem as sticky, maybe because I was applying it to finished wood? I'm not sure but it was tough getting the markings to stay on the wood rather than on the backing paper. This was pretty frustrating because every time one of markings didn't stick or shifted I had to remeasure everything, I actually had to paint on one of of the lines with my Stila waterproof eyeliner because that decal just wouldn't stick on, but eventually as with all DIY projects perseverance paid off!!
Once I had all the markings applied to the chart, I started applying the numbers. There are many different ways to set up the numbers but I decided to keep it looking like a traditional ruler by placing the number horizontally right before the large inch markers.
Then I added the final touch by applying our family name and year to the ruler! Once I was done with the ruler I had to figure out a safe and sturdy way to attach it to her wall. I headed back to home depot and purchased this heavy duty picture hanger.
We had a few mishaps trying to hang it on the wall, for one thing we procrastinated for several weeks and then when my husband finally got around to it, he hung it upside down! And when I say he hung it upside down, I really mean both of us, because I was right there with him but I didn't realize either, I kept saying "something's not quite right" but couldn't figure out what. It seriously took me 10 minutes of squinting at it with my head tilted to the side to realize that the darn thing was upside down! We had a good laugh about that. Now her wall chart is complete and her room is complete too!
I thought this was such an awesome shortcut for me. I wouldn't have to worry about painting or drawing on the lines and numbers accurately; I could just apply the pre-measured decals instead. Best of all I wouldn't need to wait for it to dry or worry about paint bleeding or making a mess. The etsy store also provides the option of personalizing the decal by adding a family name or phrase to the chart.
So we all headed out to the lumber section of our local Home Depot to pick out a 6ft piece of wood for her ruler. Originally I was planning to buy a raw cut of pine wood and then I would have to sand and stain it myself however I found a pre-finished cut of oak wood which was already the perfect size and color which would save me even more time and work! The exact dimensions of the wood was 1 x 6 x12 (one inch thick, 12 inches wide and 6 ft long)
Once I brought the wood home it still needed a bit of sandpapering over the edges. Thankfully it stopped raining long enough for me to get that done outside
Once that was done I grabbed my tape measure (because I couldn't find a ruler), and starting marking off 12 inch intervals on the plank of wood. Then I started applying the decal. It was a little bit trickier than I anticipated because the decal markings weren't really in the right order. I assumed that each 12 inch strip of markings would be a full set of ruler markings, i.e. from 1 inch to 2 inch but instead the decals were more like from half an inch to 1.5 inch so it was bit confusing applying it. I understand that the seller set it up this way because most people choose to hang their decal about 6 inches off the floor to make up for the baseboard that runs along the wall. Our current place has very flat baseboards so I wanted to make the growth chart like a real ruler and start from zero, hence the reason why it was harder for me.
Unlike previous decals I have worked with, these markings didn't seem as sticky, maybe because I was applying it to finished wood? I'm not sure but it was tough getting the markings to stay on the wood rather than on the backing paper. This was pretty frustrating because every time one of markings didn't stick or shifted I had to remeasure everything, I actually had to paint on one of of the lines with my Stila waterproof eyeliner because that decal just wouldn't stick on, but eventually as with all DIY projects perseverance paid off!!
Once I had all the markings applied to the chart, I started applying the numbers. There are many different ways to set up the numbers but I decided to keep it looking like a traditional ruler by placing the number horizontally right before the large inch markers.
We had a few mishaps trying to hang it on the wall, for one thing we procrastinated for several weeks and then when my husband finally got around to it, he hung it upside down! And when I say he hung it upside down, I really mean both of us, because I was right there with him but I didn't realize either, I kept saying "something's not quite right" but couldn't figure out what. It seriously took me 10 minutes of squinting at it with my head tilted to the side to realize that the darn thing was upside down! We had a good laugh about that. Now her wall chart is complete and her room is complete too!


great job done! It looks wonderful.
ReplyDeleteThanks Maz!
ReplyDelete